OpenClaw Docker 安装教程(2026):宿主机直装 vs Docker,Debian/Ubuntu 完整指南

之前用 Docker 装 OpenClaw,最大的问题不是“能不能跑”,而是“权限不够用 + 排错不爽”。再加上 1Panel 更新后要先填 API(我这边没配好),索性直接宿主机直装(Debian / root),省事很多。
先说一句:这篇不是官方文档,我就是把我自己装的时候从头到尾走的流程写清楚,顺便解释下每一步“它在干嘛、为啥这么选”。
官网在这:https://openclaw.ai/
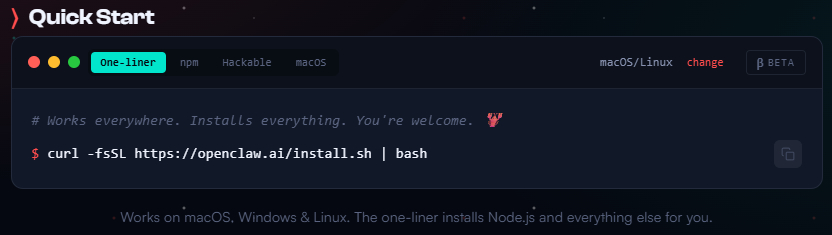
进去之后默认给的是 PowerShell 命令,我是 Debian,所以点一下 change 切到 Linux/macOS。
宿主机直装 vs Docker:我为啥又改回宿主机
我不黑 Docker,Docker 很多场景真香。但 OpenClaw 这种“可能要读文件/跑动作/接工具”的东西,Docker 的隔离在某些时候会变成麻烦。
我自己的感受大概是:
- Docker:优点是干净、可回滚;缺点是权限/挂载/网络/系统服务这些细节一多,就开始反复横跳。
- 宿主机:优点是想干啥就干啥(尤其是排错),systemd 常驻也顺;缺点是你得自己把安全边界想清楚。
所以我最后选宿主机,原因很朴素:我就是想它先稳定跑起来。
我的环境(方便你对号入座)
- 系统:Debian(Ubuntu 也一样)
- 权限:root 直接装(单人 VPS,懒得建用户)
- 渠道:Telegram
- 默认网关:
127.0.0.1:18789(只监听本机)
如果你是多用户机器/公司机,强烈建议单独建用户 + 做最小权限。
我当时的安装流程(真实记录版)
1) 官网那一行命令
官网给你一行安装命令,直接在 VPS 里贴过去跑。
为啥宿主机?
权限够用、服务好管、出问题也好排查,不用和 Docker 权限打架。
2) 安全提示:看完再点 Yes
安装一开始会吐一大段安全提示(你看末尾日志就知道有多长)。核心意思就是:
- 这是 beta 项目
- bot 有读文件/执行动作的能力
- 配置不当会有风险
我看完就点 Yes 继续。老话再提:先备份。
3) QuickStart 默认项
QuickStart 默认是:
- 端口:
18789 - 绑定:
127.0.0.1 - 认证:Token
我全部默认。
这也解释了很多人遇到的第一个问题:“为啥我在外网打不开控制面板?”
4) OpenAI OAuth(VPS 要本地登录)
它会给你一个 URL,提示你:
- 在 本地浏览器打开
- 登录后复制回调链接
- 粘贴回终端
远程 VPS 没浏览器,这步很正常。
5) 选 Telegram 作为渠道
我选的是 Telegram,因为最省事也最稳:
- 找 @BotFather
/newbot- 拿到 token
- 粘贴进终端
小建议:token 别到处乱贴,尤其别贴到公开博客里(你看我这里已经打码了)。
6) skills 依赖:可以先跳过,后面再补
安装会提示 pnpm / brew / go,我当时没装,所以报错了,但 不影响主程序跑起来。
后面需要再补的话,先跑:
openclaw doctor它会告诉你缺啥。
如果你就想把 pnpm 补上(Debian/Ubuntu 最短路径),大概是:
apt update
apt install -y nodejs npm
npm install -g pnpm
7) systemd 常驻(这步很关键)
安装会启用 systemd user service,并开启 lingering(日志里能看到)。
简单理解:不然你 SSH 一断,服务就跟着断。
你可以用这几条确认一下:
systemctl --user status openclaw-gateway
journalctl --user -u openclaw-gateway -n 200 --no-pager
8) 控制面板(Control UI)怎么打开
安装完成后会给你:
- 本地面板地址
http://127.0.0.1:18789/ - 带 token 的访问链接(我已打码)
因为它只绑定 127.0.0.1,你想从自己电脑打开,最简单就是 SSH 隧道:
ssh -L 18789:127.0.0.1:18789 root@你的服务器IP
然后本地浏览器访问:http://127.0.0.1:18789/。
9) UI 资源缺失 / pnpm ui:build
日志里有一句:
Missing Control UI assets. Build them with pnpm ui:build意思是 UI 资源没构建。你把 pnpm 装好以后,按提示跑一下 pnpm ui:build 就行。
10) 进 TUI “孵化”一下
最后会提示:
openclaw tui进去慢慢配,别一上来就全开工具权限(尤其你还准备把它暴露到公网的话)。
装完必做 3 件事(不然迟早踩坑)
- 确认服务真的常驻
- 别把 18789 直接暴露到公网
你真要公网访问,建议走反代 + 访问控制;不然就是“我把控制面板开在公网,等人来敲门”。
- 把日志里的敏感信息处理一下
- Telegram bot token
- OAuth 回调里带的 code
- Control UI 的 token 链接
这些东西泄露了,后果一般都不太好玩。
FAQ(顺手加点 SEO 长尾)
Q1:OpenClaw 能不能用 Docker 装?
能。只是如果你后续要让它读写宿主机文件、跑工具、接各种依赖,Docker 会更容易遇到“权限不够/挂载麻烦/排错麻烦”。我这次才改回宿主机。
Q2:Control UI 为啥外网打不开?
因为默认只绑定 127.0.0.1:18789。用 SSH 隧道,或者自己做反代(别裸奔公网)。
Q3:安装时提示 spawn pnpm ENOENT 怎么办?
就是没装 pnpm。装 node/npm,然后 npm i -g pnpm。
Q4:提示 Missing Control UI assets?
装好 pnpm 后跑 pnpm ui:build。
Q5:我怎么确认 systemd 常驻没问题?
看 systemctl --user status openclaw-gateway,再看 journalctl --user -u openclaw-gateway。
具体安装教程可以这里:


完整命令行输出(原样保留)
下面是我当时的完整命令行输出(原样保留,包含全过程)。敏感信息已打码。
完整命令行输出(点开)
🦞 OpenClaw installed successfully (2026.1.29)!
Ahh nice, I like it here. Got any snacks?
Starting setup...
🦞 OpenClaw 2026.1.29 (a5b4d22) — Give me a workspace and I'll give you fewer tabs, fewer toggles, and more oxygen.
▄▄▄▄▄▄▄▄▄▄▄▄▄▄▄▄▄▄▄▄▄▄▄▄▄▄▄▄▄▄▄▄▄▄▄▄▄▄▄▄▄▄▄▄▄▄▄▄▄▄▄▄
██░▄▄▄░██░▄▄░██░▄▄▄██░▀██░██░▄▄▀██░████░▄▄▀██░███░██
██░███░██░▀▀░██░▄▄▄██░█░█░██░█████░████░▀▀░██░█░█░██
██░▀▀▀░██░█████░▀▀▀██░██▄░██░▀▀▄██░▀▀░█░██░██▄▀▄▀▄██
▀▀▀▀▀▀▀▀▀▀▀▀▀▀▀▀▀▀▀▀▀▀▀▀▀▀▀▀▀▀▀▀▀▀▀▀▀▀▀▀▀▀▀▀▀▀▀▀▀▀▀▀
🦞 OPENCLAW 🦞
┌ OpenClaw onboarding
│
◇ Security ──────────────────────────────────────────────────────────────────────────────╮
│ │
│ Security warning — please read. │
│ │
│ OpenClaw is a hobby project and still in beta. Expect sharp edges. │
│ This bot can read files and run actions if tools are enabled. │
│ A bad prompt can trick it into doing unsafe things. │
│ │
│ If you’re not comfortable with basic security and access control, don’t run OpenClaw. │
│ Ask someone experienced to help before enabling tools or exposing it to the internet. │
│ │
│ Recommended baseline: │
│ - Pairing/allowlists + mention gating. │
│ - Sandbox + least-privilege tools. │
│ - Keep secrets out of the agent’s reachable filesystem. │
│ - Use the strongest available model for any bot with tools or untrusted inboxes. │
│ │
│ Run regularly: │
│ openclaw security audit --deep │
│ openclaw security audit --fix │
│ │
│ Must read: https://docs.openclaw.ai/gateway/security │
│ │
├─────────────────────────────────────────────────────────────────────────────────────────╯
│
◇ I understand this is powerful and inherently risky. Continue?
│ Yes
│
◇ Onboarding mode
│ QuickStart
│
◇ QuickStart ─────────────────────────╮
│ │
│ Gateway port: 18789 │
│ Gateway bind: Loopback (127.0.0.1) │
│ Gateway auth: Token (default) │
│ Tailscale exposure: Off │
│ Direct to chat channels. │
│ │
├──────────────────────────────────────╯
│
◇ Model/auth provider
│ OpenAI
│
◇ OpenAI auth method
│ OpenAI Codex (ChatGPT OAuth)
│
◇ OpenAI Codex OAuth ─────────────────────────────────────────╮
│ │
│ You are running in a remote/VPS environment. │
│ A URL will be shown for you to open in your LOCAL browser. │
│ After signing in, paste the redirect URL back here. │
│ │
├──────────────────────────────────────────────────────────────╯
│
◇ OAuth URL ready
Open this URL in your LOCAL browser:
[OAuth 授权链接已打码]
│
◇ Paste the redirect URL (or authorization code)
http://localhost:1455/auth/callback?code=<redacted>
◇ OpenAI OAuth complete
│
◇ Model configured ──────────────────────────╮
│ │
│ Default model set to openai-codex/gpt-5.2 │
│ │
├─────────────────────────────────────────────╯
│
◇ Default model
│ openai-codex/gpt-5.2
│
◇ Channel status ────────────────────────────╮
│ │
│ Telegram: not configured │
│ WhatsApp: not configured │
│ Discord: not configured │
│ Google Chat: not configured │
│ Slack: not configured │
│ Signal: not configured │
│ iMessage: not configured │
│ Google Chat: install plugin to enable │
│ Nostr: install plugin to enable │
│ Microsoft Teams: install plugin to enable │
│ Mattermost: install plugin to enable │
│ Nextcloud Talk: install plugin to enable │
│ Matrix: install plugin to enable │
│ BlueBubbles: install plugin to enable │
│ LINE: install plugin to enable │
│ Zalo: install plugin to enable │
│ Zalo Personal: install plugin to enable │
│ Tlon: install plugin to enable │
│ │
├─────────────────────────────────────────────╯
│
◇ How channels work ─────────────────────────────────────────────────────────────────────╮
│ │
│ DM security: default is pairing; unknown DMs get a pairing code. │
│ Approve with: openclaw pairing approve <channel> <code> │
│ Public DMs require dmPolicy="open" + allowFrom=["*"]. │
│ Multi-user DMs: set session.dmScope="per-channel-peer" (or "per-account-channel-peer" │
│ for multi-account channels) to isolate sessions. │
│ Docs: start/pairing │
│ │
│ Telegram: simplest way to get started — register a bot with @BotFather and get going. │
│ WhatsApp: works with your own number; recommend a separate phone + eSIM. │
│ Discord: very well supported right now. │
│ Google Chat: Google Workspace Chat app with HTTP webhook. │
│ Slack: supported (Socket Mode). │
│ Signal: signal-cli linked device; more setup (David Reagans: "Hop on Discord."). │
│ iMessage: this is still a work in progress. │
│ Nostr: Decentralized protocol; encrypted DMs via NIP-04. │
│ Microsoft Teams: Bot Framework; enterprise support. │
│ Mattermost: self-hosted Slack-style chat; install the plugin to enable. │
│ Nextcloud Talk: Self-hosted chat via Nextcloud Talk webhook bots. │
│ Matrix: open protocol; install the plugin to enable. │
│ BlueBubbles: iMessage via the BlueBubbles mac app + REST API. │
│ LINE: LINE Messaging API bot for Japan/Taiwan/Thailand markets. │
│ Zalo: Vietnam-focused messaging platform with Bot API. │
│ Zalo Personal: Zalo personal account via QR code login. │
│ Tlon: decentralized messaging on Urbit; install the plugin to enable. │
│ │
├─────────────────────────────────────────────────────────────────────────────────────────╯
│
◇ Select channel (QuickStart)
│ Telegram (Bot API)
│
◇ Telegram bot token ────────────────────────────────────╮
│ │
│ 1) Open Telegram and chat with @BotFather │
│ 2) Run /newbot (or /mybots) │
│ 3) Copy the token (looks like <telegram_token_redacted>...) │
│ Tip: you can also set TELEGRAM_BOT_TOKEN in your env. │
│ Docs: https://docs.openclaw.ai/telegram │
│ Website: https://openclaw.ai │
│ │
├─────────────────────────────────────────────────────────╯
│
◇ Enter Telegram bot token
│ <telegram_token_redacted>
│
◇ Selected channels ──────────────────────────────────────────────────────────────────────╮
│ │
│ Telegram — simplest way to get started — register a bot with @BotFather and get going. │
│ https://docs.openclaw.ai/channels/telegr │
│ am │
│ https://openclaw.ai │
│ │
├──────────────────────────────────────────────────────────────────────────────────────────╯
Updated ~/.openclaw/openclaw.json
Workspace OK: ~/.openclaw/workspace
Sessions OK: ~/.openclaw/agents/main/sessions
│
◇ Skills status ────────────╮
│ │
│ Eligible: 3 │
│ Missing requirements: 46 │
│ Blocked by allowlist: 0 │
│ │
├────────────────────────────╯
│
◇ Configure skills now? (recommended)
│ Yes
│
◇ Homebrew recommended ──────────────────────────────────────────────────────────╮
│ │
│ Many skill dependencies are shipped via Homebrew. │
│ Without brew, you'll need to build from source or download releases manually. │
│ │
├─────────────────────────────────────────────────────────────────────────────────╯
│
◇ Show Homebrew install command?
│ Yes
│
◇ Homebrew install ─────────────────────────────────────────────────────╮
│ │
│ Run: │
│ /bin/bash -c "$(curl -fsSL │
│ https://raw.githubusercontent.com/Homebrew/install/HEAD/install.sh)" │
│ │
├────────────────────────────────────────────────────────────────────────╯
│
◇ Preferred node manager for skill installs
│ pnpm
│
◇ Install missing skill dependencies
│ 📰 blogwatcher, 🧩 clawdhub, 📦 mcporter, 📊 model-usage, 🎙️ openai-whisper, 🧾 summarize, 🎞️ video-frames
│
◇ Install failed: clawdhub — spawn pnpm ENOENT
spawn pnpm ENOENT
Tip: run `openclaw doctor` to review skills + requirements.
Docs: https://docs.openclaw.ai/skills
│
◇ Install failed: mcporter — spawn pnpm ENOENT
spawn pnpm ENOENT
Tip: run `openclaw doctor` to review skills + requirements.
Docs: https://docs.openclaw.ai/skills
│
◇ Install failed: model-usage — missing brew formula
Tip: run `openclaw doctor` to review skills + requirements.
Docs: https://docs.openclaw.ai/skills
│
◇ Install failed: openai-whisper — brew not installed
Tip: run `openclaw doctor` to review skills + requirements.
Docs: https://docs.openclaw.ai/skills
│
◇ Install failed: video-frames — brew not installed
Tip: run `openclaw doctor` to review skills + requirements.
Docs: https://docs.openclaw.ai/skills
│
◇ Install failed: summarize — brew not installed
Tip: run `openclaw doctor` to review skills + requirements.
Docs: https://docs.openclaw.ai/skills
│
◇ Install failed: blogwatcher — go not installed (install via brew)
Tip: run `openclaw doctor` to review skills + requirements.
Docs: https://docs.openclaw.ai/skills
│
◇ Set GOOGLE_PLACES_API_KEY for goplaces?
│ No
│
◇ Set GOOGLE_PLACES_API_KEY for local-places?
│ No
│
◇ Set GEMINI_API_KEY for nano-banana-pro?
│ No
│
◇ Set NOTION_API_KEY for notion?
│ No
│
◇ Set OPENAI_API_KEY for openai-image-gen?
│ No
│
◇ Set OPENAI_API_KEY for openai-whisper-api?
│ No
│
◇ Set ELEVENLABS_API_KEY for sag?
│ No
│
◇ Hooks ──────────────────────────────────────────────────────────╮
│ │
│ Hooks let you automate actions when agent commands are issued. │
│ Example: Save session context to memory when you issue /new. │
│ │
│ Learn more: https://docs.openclaw.ai/hooks │
│ │
├──────────────────────────────────────────────────────────────────╯
│
◇ Enable hooks?
│ 🚀 boot-md, 💾 session-memory
│
◇ Hooks Configured ─────────────────────────╮
│ │
│ Enabled 2 hooks: boot-md, session-memory │
│ │
│ You can manage hooks later with: │
│ openclaw hooks list │
│ openclaw hooks enable <name> │
│ openclaw hooks disable <name> │
│ │
├────────────────────────────────────────────╯
│
◇ Systemd ────────────────────────────────────────────────────────────────────────────────╮
│ │
│ Linux installs use a systemd user service by default. Without lingering, systemd stops │
│ the user session on logout/idle and kills the Gateway. │
│ Enabling lingering now (may require sudo; writes /var/lib/systemd/linger). │
│ │
├──────────────────────────────────────────────────────────────────────────────────────────╯
│
◇ Systemd ─────────────────────────────╮
│ │
│ Enabled systemd lingering for root. │
│ │
├───────────────────────────────────────╯
│
◇ Gateway service runtime ────────────────────────────────────────────╮
│ │
│ QuickStart uses Node for the Gateway service (stable + supported). │
│ │
├──────────────────────────────────────────────────────────────────────╯
│
◓ Installing Gateway service…
Installed systemd service: /root/.config/systemd/user/openclaw-gateway.service
◇ Gateway service installed
│
◇
Telegram: ok (@aihelpxbot) (1559ms)
Agents: main (default)
Heartbeat interval: 30m (main)
Session store (main): /root/.openclaw/agents/main/sessions/sessions.json (0 entries)
Missing Control UI assets. Build them with `pnpm ui:build` (auto-installs UI deps).
│
◇ Optional apps ────────────────────────╮
│ │
│ Add nodes for extra features: │
│ - macOS app (system + notifications) │
│ - iOS app (camera/canvas) │
│ - Android app (camera/canvas) │
│ │
├────────────────────────────────────────╯
│
◇ Control UI ─────────────────────────────────────────────────────────────────────╮
│ │
│ Web UI: http://127.0.0.1:18789/ │
│ Web UI (with token): │
│ http://127.0.0.1:18789/?token=<redacted> │
│ Gateway WS: ws://127.0.0.1:18789 │
│ Gateway: reachable │
│ Docs: https://docs.openclaw.ai/web/control-ui │
│ │
├──────────────────────────────────────────────────────────────────────────────────╯
│
◇ Start TUI (best option!) ─────────────────────────────────╮
│ │
│ This is the defining action that makes your agent you. │
│ Please take your time. │
│ The more you tell it, the better the experience will be. │
│ We will send: "Wake up, my friend!" │
│ │
├────────────────────────────────────────────────────────────╯
│
◇ Token ────────────────────────────────────────────────────────────────────────────────╮
│ │
│ Gateway token: shared auth for the Gateway + Control UI. │
│ Stored in: ~/.openclaw/openclaw.json (gateway.auth.token) or OPENCLAW_GATEWAY_TOKEN. │
│ Web UI stores a copy in this browser's localStorage (openclaw.control.settings.v1). │
│ Get the tokenized link anytime: openclaw dashboard --no-open │
│ │
├────────────────────────────────────────────────────────────────────────────────────────╯
│
◇ How do you want to hatch your bot?
│ Hatch in TUI (recommended)
│
◇ Workspace backup ────────────────────────────────────────╮
│ │
│ Back up your agent workspace. │
│ Docs: https://docs.openclaw.ai/concepts/agent-workspace │
│ │
├───────────────────────────────────────────────────────────╯
│
◇ Security ──────────────────────────────────────────────────────╮
│ │
│ Running agents on your computer is risky — harden your setup: │
│ https://docs.openclaw.ai/security │
│ │
├─────────────────────────────────────────────────────────────────╯
│
◇ Web search (optional) ─────────────────────────────────────────────────────────────────╮
│ │
│ If you want your agent to be able to search the web, you’ll need an API key. │
│ │
│ OpenClaw uses Brave Search for the `web_search` tool. Without a Brave Search API key, │
│ web search won’t work. │
│ │
│ Set it up interactively: │
│ - Run: openclaw configure --section web │
│ - Enable web_search and paste your Brave Search API key │
│ │
│ Alternative: set BRAVE_API_KEY in the Gateway environment (no config changes). │
│ Docs: https://docs.openclaw.ai/tools/web │
│ │
├─────────────────────────────────────────────────────────────────────────────────────────╯
│
◇ What now ─────────────────────────────────────────────────────────────╮
│ │
│ What now: https://openclaw.ai/showcase ("What People Are Building"). │
│ │
├────────────────────────────────────────────────────────────────────────╯
│
└ Onboarding complete. Use the tokenized dashboard link above to control OpenClaw.
openclaw tui - ws://127.0.0.1:18789 - agent main - session main

Member discussion