

Notion 商业版 6 个月免费试用教程:提取 API 调用 Claude Code / OpenAI 模型(VPS 部署全流程)
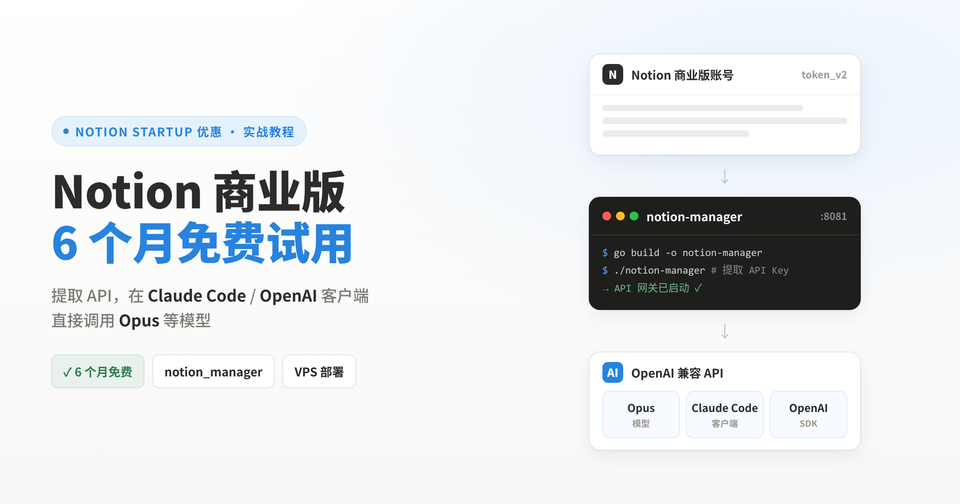
这篇是我自己折腾 Notion 商业版(Business)六个月试用的记录。申请下来之后,再用开源项目 notion_manager 把 API 提出来,就能在 Claude Code、OpenAI 兼容客户端里调 Opus 这些模型了。整体就两步:先把试用申请下来,然后在 VPS 上把 notion_manager 跑起来。
先说一句,下面用到的引荐密钥、批量注册这些都是网上翻来的,随时可能失效或者被薅没了,能不能用、有没有风险自己掂量,我只是记个笔记。
一、申请 Notion 商业版试用
Notion 对初创团队有个 Startup 优惠,走引荐伙伴(Referral Partner)的密钥,最长能拿到 6 个月试用。
流程大概是这样:
- 进去之后点 Unlock your startup offer。
- 公司规模选 51–100,好像得 100 人以下才过。
- 到选引荐伙伴这一步,先填合作伙伴名字,再填对应的密钥。
填域名邮箱,收验证码填进去。

打开 Notion 官网,点顶部导航的 Solutions → Startups。

密钥我在论坛上扒了几个,有效期不太稳定,建议挑靠谱的先试:
| 合作伙伴 | 密钥 | 时长 |
|---|---|---|
| Product Hunt | NotionXPH |
随机 3–6 个月 |
| Marie Gautron | mariegautron2533 |
3 个月 |
| Enterprise Nation | STARTUP4110P66695 |
6 个月,这个比较稳 |

某个密钥用不了(失效或者额度没了),换一个再试就行。都填完基本就开通了。

接下来提取api ,我是用的这个项目:https://github.com/SleepingBag945/notion_manager
二、提取 API
开通之后,账号管理和提 API 我用的是这个项目:https://github.com/SleepingBag945/notion_manager
下面从 VPS 环境开始,一步步搭起来。
三、VPS 基础准备
SSH 登上 VPS(我这里直接用 root 演示了,正经跑的话建议后面单独建个普通用户):
apt update && apt full-upgrade -y
apt install -y curl wget git ca-certificates ufw
顺手加个 1GB swap,1C2G 的小机器编译、并发一高容易顶不住,加一层保险(VPS 商家已经给了 swap 就跳过):
fallocate -l 1G /swapfile
chmod 600 /swapfile
mkswap /swapfile
swapon /swapfile
echo '/swapfile none swap sw 0 0' >> /etc/fstab
四、安装 Go
项目的 go.mod 要 Go 1.26。Debian 13 apt 源里的 Go 一般都偏老,别用 apt 装了,直接去官网下。
打开 https://go.dev/dl/,找对应架构的最新版 go1.2x.x.linux-amd64.tar.gz(ARM 机器就下 linux-arm64.tar.gz),复制链接:
cd /tmp
wget <https://go.dev/dl/go1.26.0.linux-amd64.tar.gz>   # 换成你实际看到的最新版本号
rm -rf /usr/local/go
tar -C /usr/local -xzf go1.26.0.linux-amd64.tar.gz
把 PATH 写进 profile,省得每次重开都失效:
echo 'export PATH=$PATH:/usr/local/go/bin' >> /etc/profile
source /etc/profile
go version   # 应输出 go1.26.x linux/amd64
五、拉代码编译
mkdir -p /opt/notion-manager
cd /opt/notion-manager
git clone <https://github.com/SleepingBag945/notion_manager.git> .

# 前端 dist 仓库里已经预编译好了,编后端就行,不用装 Node/npm
go build -o notion-manager ./cmd/notion-manager
编完当前目录会多出一个 notion-manager 可执行文件。
懒得在 VPS 上装 Go、编译的话,也可以直接去项目 Releases 下对应架构的预编译二进制,第四、五步整个跳过。
六、首次运行,生成配置
cd /opt/notion-manager
./notion-manager
第一次跑会干这几件事:
- 没有
config.yaml的话自动生成一个; - 在控制台打印随机生成的 Dashboard 密码和 API Key,这俩一定要马上存下来,密码只会以哈希存进 config,之后就找不回来了;
- 默认监听
:8081。
看到日志正常跑起来就 Ctrl+C 停掉,接下来配成常驻服务。
config.yaml 按需改(完整字段看项目的 configuration_cn.md),至少确认这几项:
server:
    port: "8081"
    admin_password: ""   # 首次生成后会自动写成哈希,别手动改回明文
    api_key: ""          # 同上,自动生成后会写回
七、用 systemd 常驻 + 开机自启
单独建个低权限用户来跑,别拿 root 长期挂着:
useradd -r -m -d /opt/notion-manager -s /usr/sbin/nologin notionmgr
chown -R notionmgr:notionmgr /opt/notion-manager
写 systemd unit:
cat > /etc/systemd/system/notion-manager.service << 'EOF'
[Unit]
Description=notion-manager
After=network.target

[Service]
Type=simple
User=notionmgr
Group=notionmgr
WorkingDirectory=/opt/notion-manager
ExecStart=/opt/notion-manager/notion-manager
Restart=on-failure
RestartSec=5

# 基础安全加固
NoNewPrivileges=true
PrivateTmp=true
ProtectSystem=full

[Install]
WantedBy=multi-user.target
EOF
启用并启动:
systemctl daemon-reload
systemctl enable --now notion-manager
systemctl status notion-manager
看实时日志:
journalctl -u notion-manager -f
八、对外暴露:最好加个 HTTPS 反代
程序默认监听 0.0.0.0:8081,直接裸奔在公网上有两个坑:
- 明文 HTTP 传 admin 密码、API Key、Notion token,中间人能截。这也是之前 cookie
Secure属性那个问题的根源——Secure cookie 只有走 HTTPS 才生效,裸 HTTP 部署等于白修。 - 端口直接怼在公网上,谁都能摸到登录页。
我用的是 Caddy 做反代,自动申 Let's Encrypt 证书,比 Nginx 好配太多,内存占用也小,1C2G 完全无压力。前提是你有个域名,把 A 记录指到这台 VPS。
apt install -y debian-keyring debian-archive-keyring apt-transport-https
curl -1sLf '<https://dl.cloudsmith.io/public/caddy/stable/gpg.key>' | gpg --dearmor -o /usr/share/keyrings/caddy-stable-archive-keyring.gpg
curl -1sLf '<https://dl.cloudsmith.io/public/caddy/stable/debian.deb.txt>' | tee /etc/apt/sources.list.d/caddy-stable.list
apt update
apt install -y caddy
配 Caddyfile:
cat > /etc/caddy/Caddyfile << 'EOF'
your-domain.com {
    reverse_proxy 127.0.0.1:8081
}
EOF
systemctl restart caddy
再用防火墙只放 80/443,把 8081 对外堵死,免得有人绕过 Caddy 直连:
ufw allow OpenSSH
ufw allow 80/tcp
ufw allow 443/tcp
ufw deny 8081/tcp
ufw enable
没域名、也懒得搞 HTTPS 的话,至少用防火墙把 8081 限制成只对自己的公网 IP 开:
ufw allow from <你的公网IP> to any port 8081 proto tcp
ufw enable
九、添加 Notion 账号
服务起来后访问 https://your-domain.com/dashboard/(或者 http://VPS-IP:8081/dashboard/),用刚才生成的密码登进去。加账号有两种方式:
- 已经有 Notion 登录态的:本地浏览器打开 notion.so →
F12→ Application → Cookies → 复制token_v2,回到 dashboard 点「+ 添加账号」粘上去。 - 批量 Microsoft-SSO 注册的:点「注册账号」,按
email----password----client_id----refresh_token的格式批量粘,细节看项目registration_cn.md。
accounts/ 目录是热加载的,加了新账号不用重启服务。

十、接进 Claude Code / OpenAI 客户端
notion-manager 会把你加进去的这些 Notion 账号聚合成一个统一的、OpenAI 兼容格式的 API。客户端里把请求地址指到自己的服务、Key 填成之前生成的那个 API Key 就行。
大致这么填:
| 配置项 | 值 |
|---|---|
| API Base URL | https://your-domain.com/v1(或 http://VPS-IP:8081/v1) |
| API Key | 首次启动时控制台打印的那个 API Key |
| 模型名 | Notion AI 支持的模型(比如 Claude Opus 之类,具体能用哪些看 dashboard / 项目文档) |
Claude Code 大概这样设环境变量:
export ANTHROPIC_BASE_URL="<https://your-domain.com>"
export ANTHROPIC_API_KEY="你的 API Key"
OpenAI 兼容客户端:
export OPENAI_BASE_URL="<https://your-domain.com/v1>"
export OPENAI_API_KEY="你的 API Key"
不同客户端的具体路径、请求头可能有点出入,最终以项目 README 里的接入说明为准。配好之后就跟平时调模型一样用了。
跑起来之后没事看看 journalctl -u notion-manager -f 的日志,顺便留意下各个 Notion 账号的试用到期时间,快过期了记得补新号,别断了额度。